mannemerjung
-
Posts
32 -
Joined
-
Last visited
mannemerjung's Achievements
")

-
Hi everybody, there are reproductions popping up on eBay! https://www.ebay.com/itm/NEW-1969-70-Riviera-Console-Rear-Lamp-Lens/123226471800?hash=item1cb0debd78:g:~BAAAOSw7UZbOnQu Given the price, I will stick to my DIY-version, but maybe someone else is interested. Alexander
-
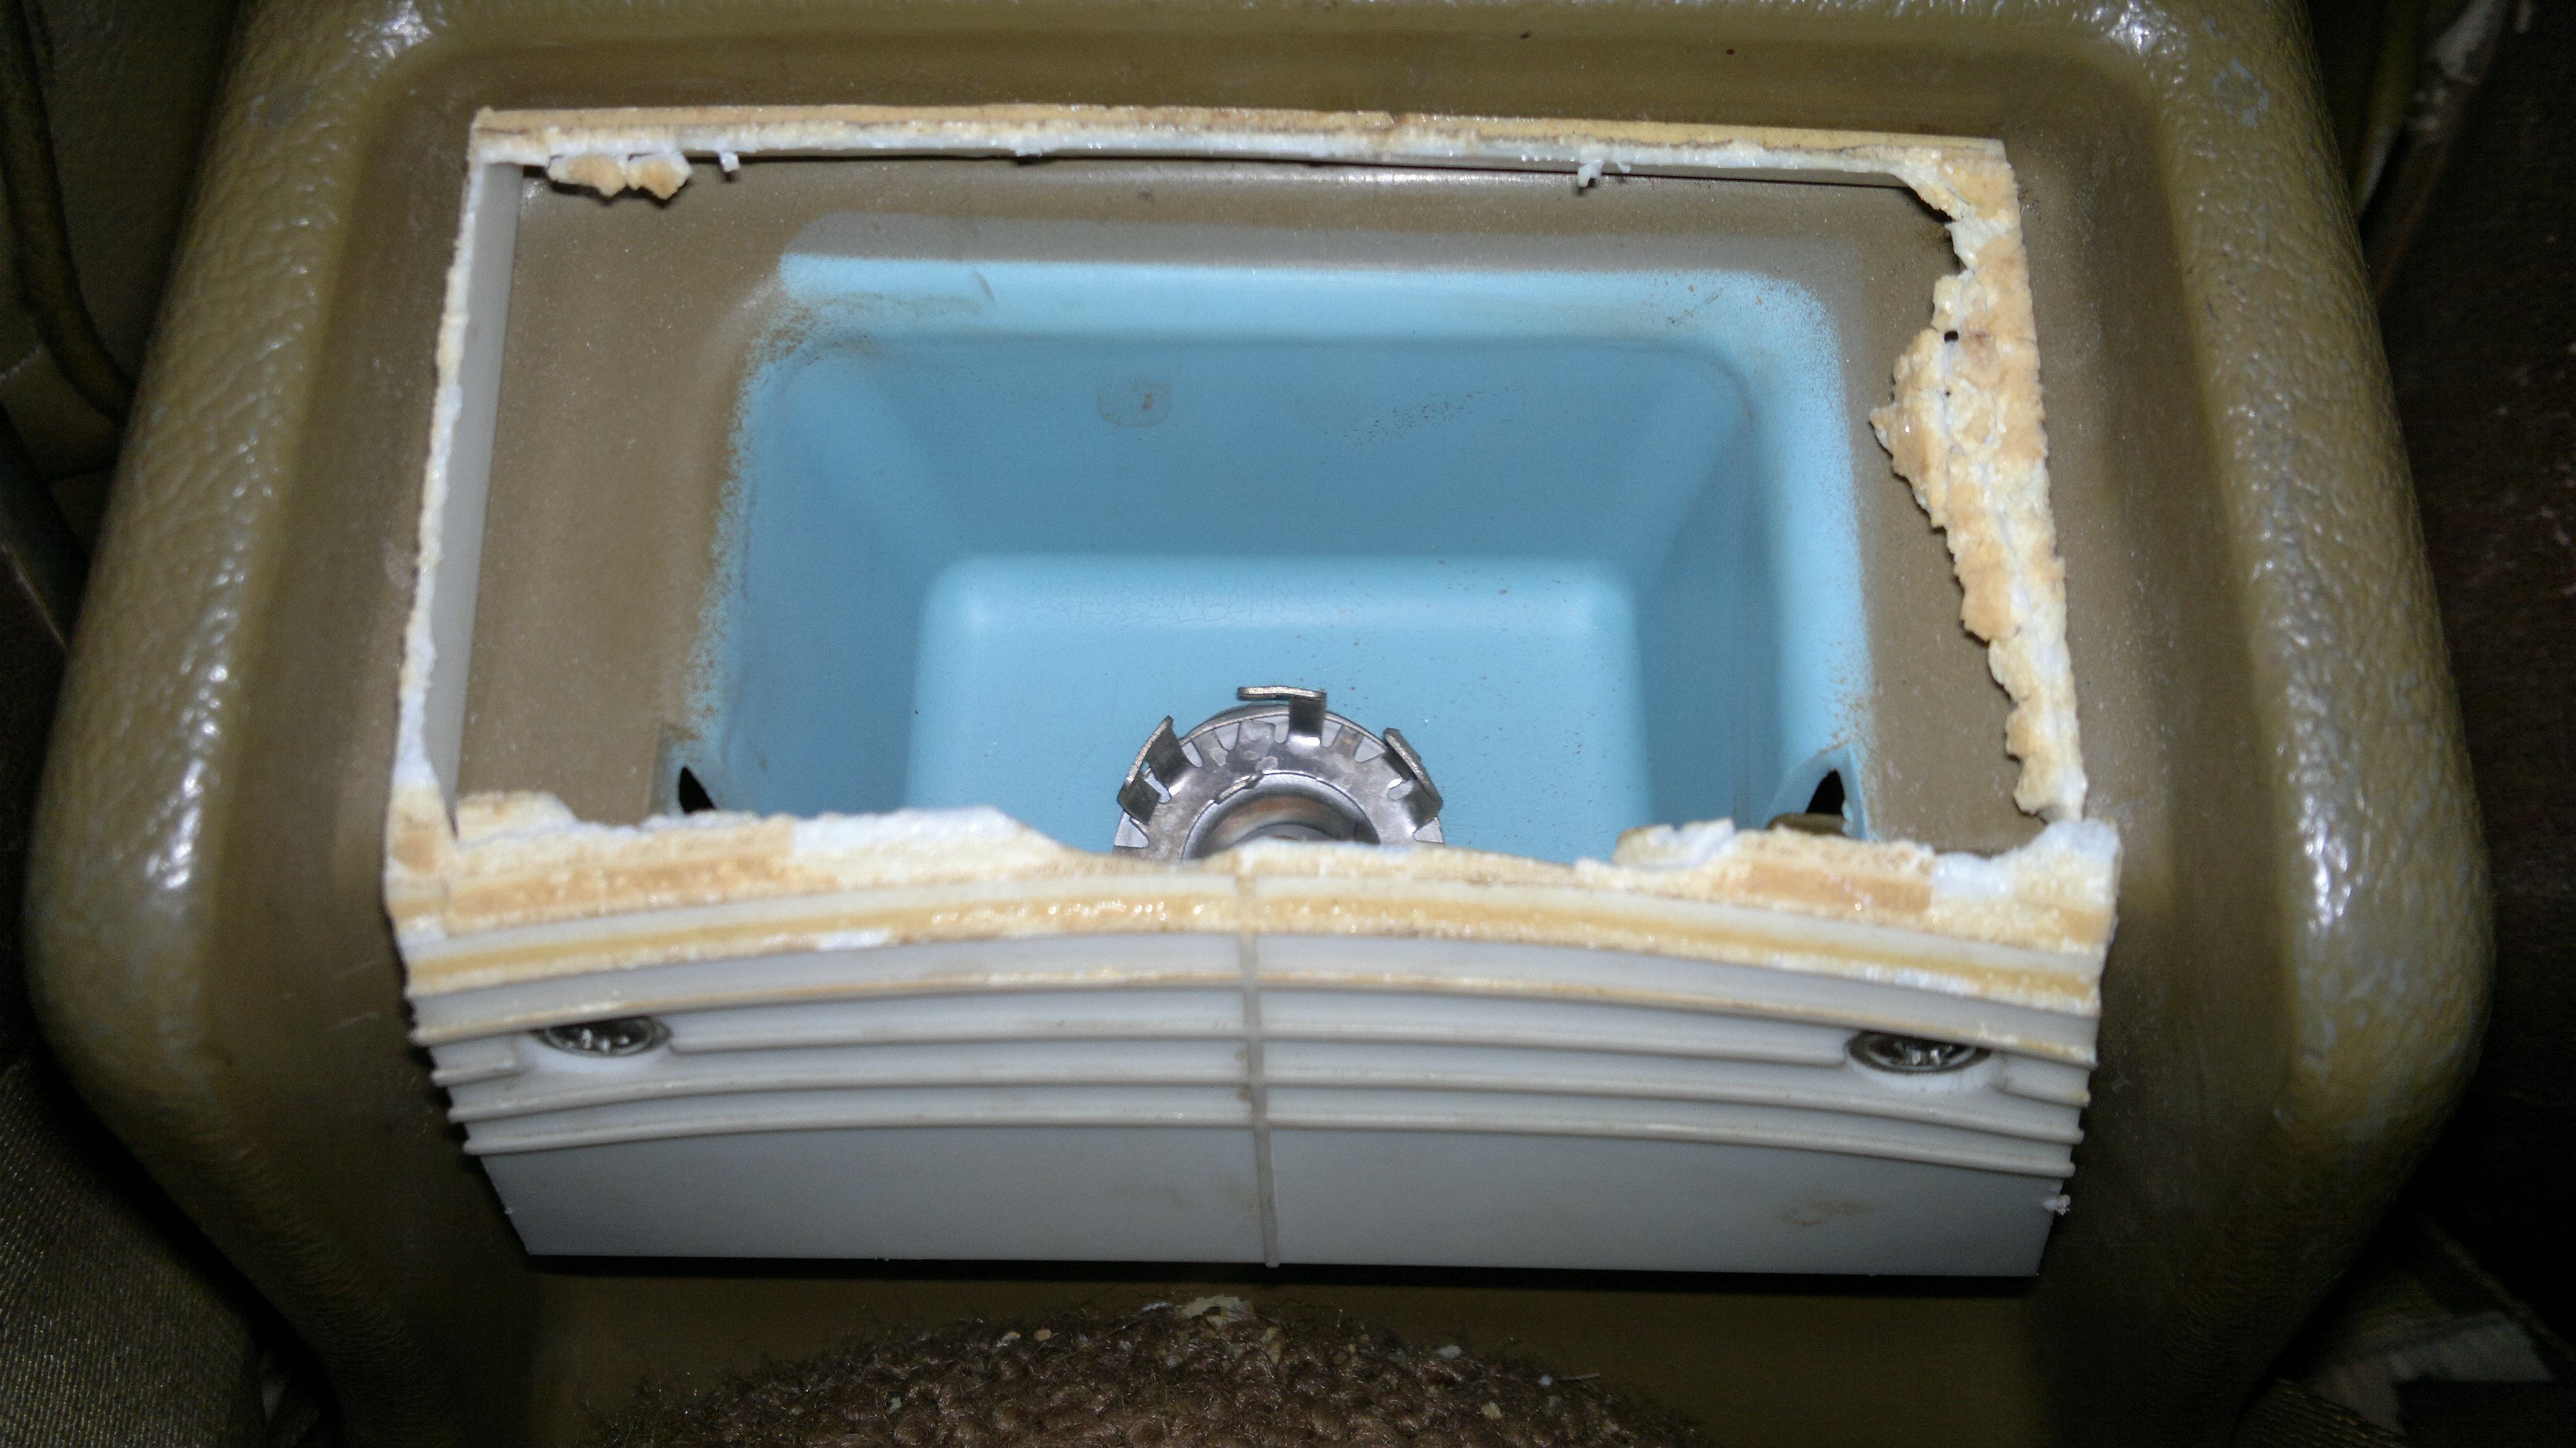
I re-used the partly burnt out old lens as a frame for the new one, the lower part was still in good shape, so I re-did the top lens and kept the lower part. The interior color is antique-gold. I am still in the restoration process, hence only some pictures from the upholstery-shop (original vinyl from sms autofabrics).


-
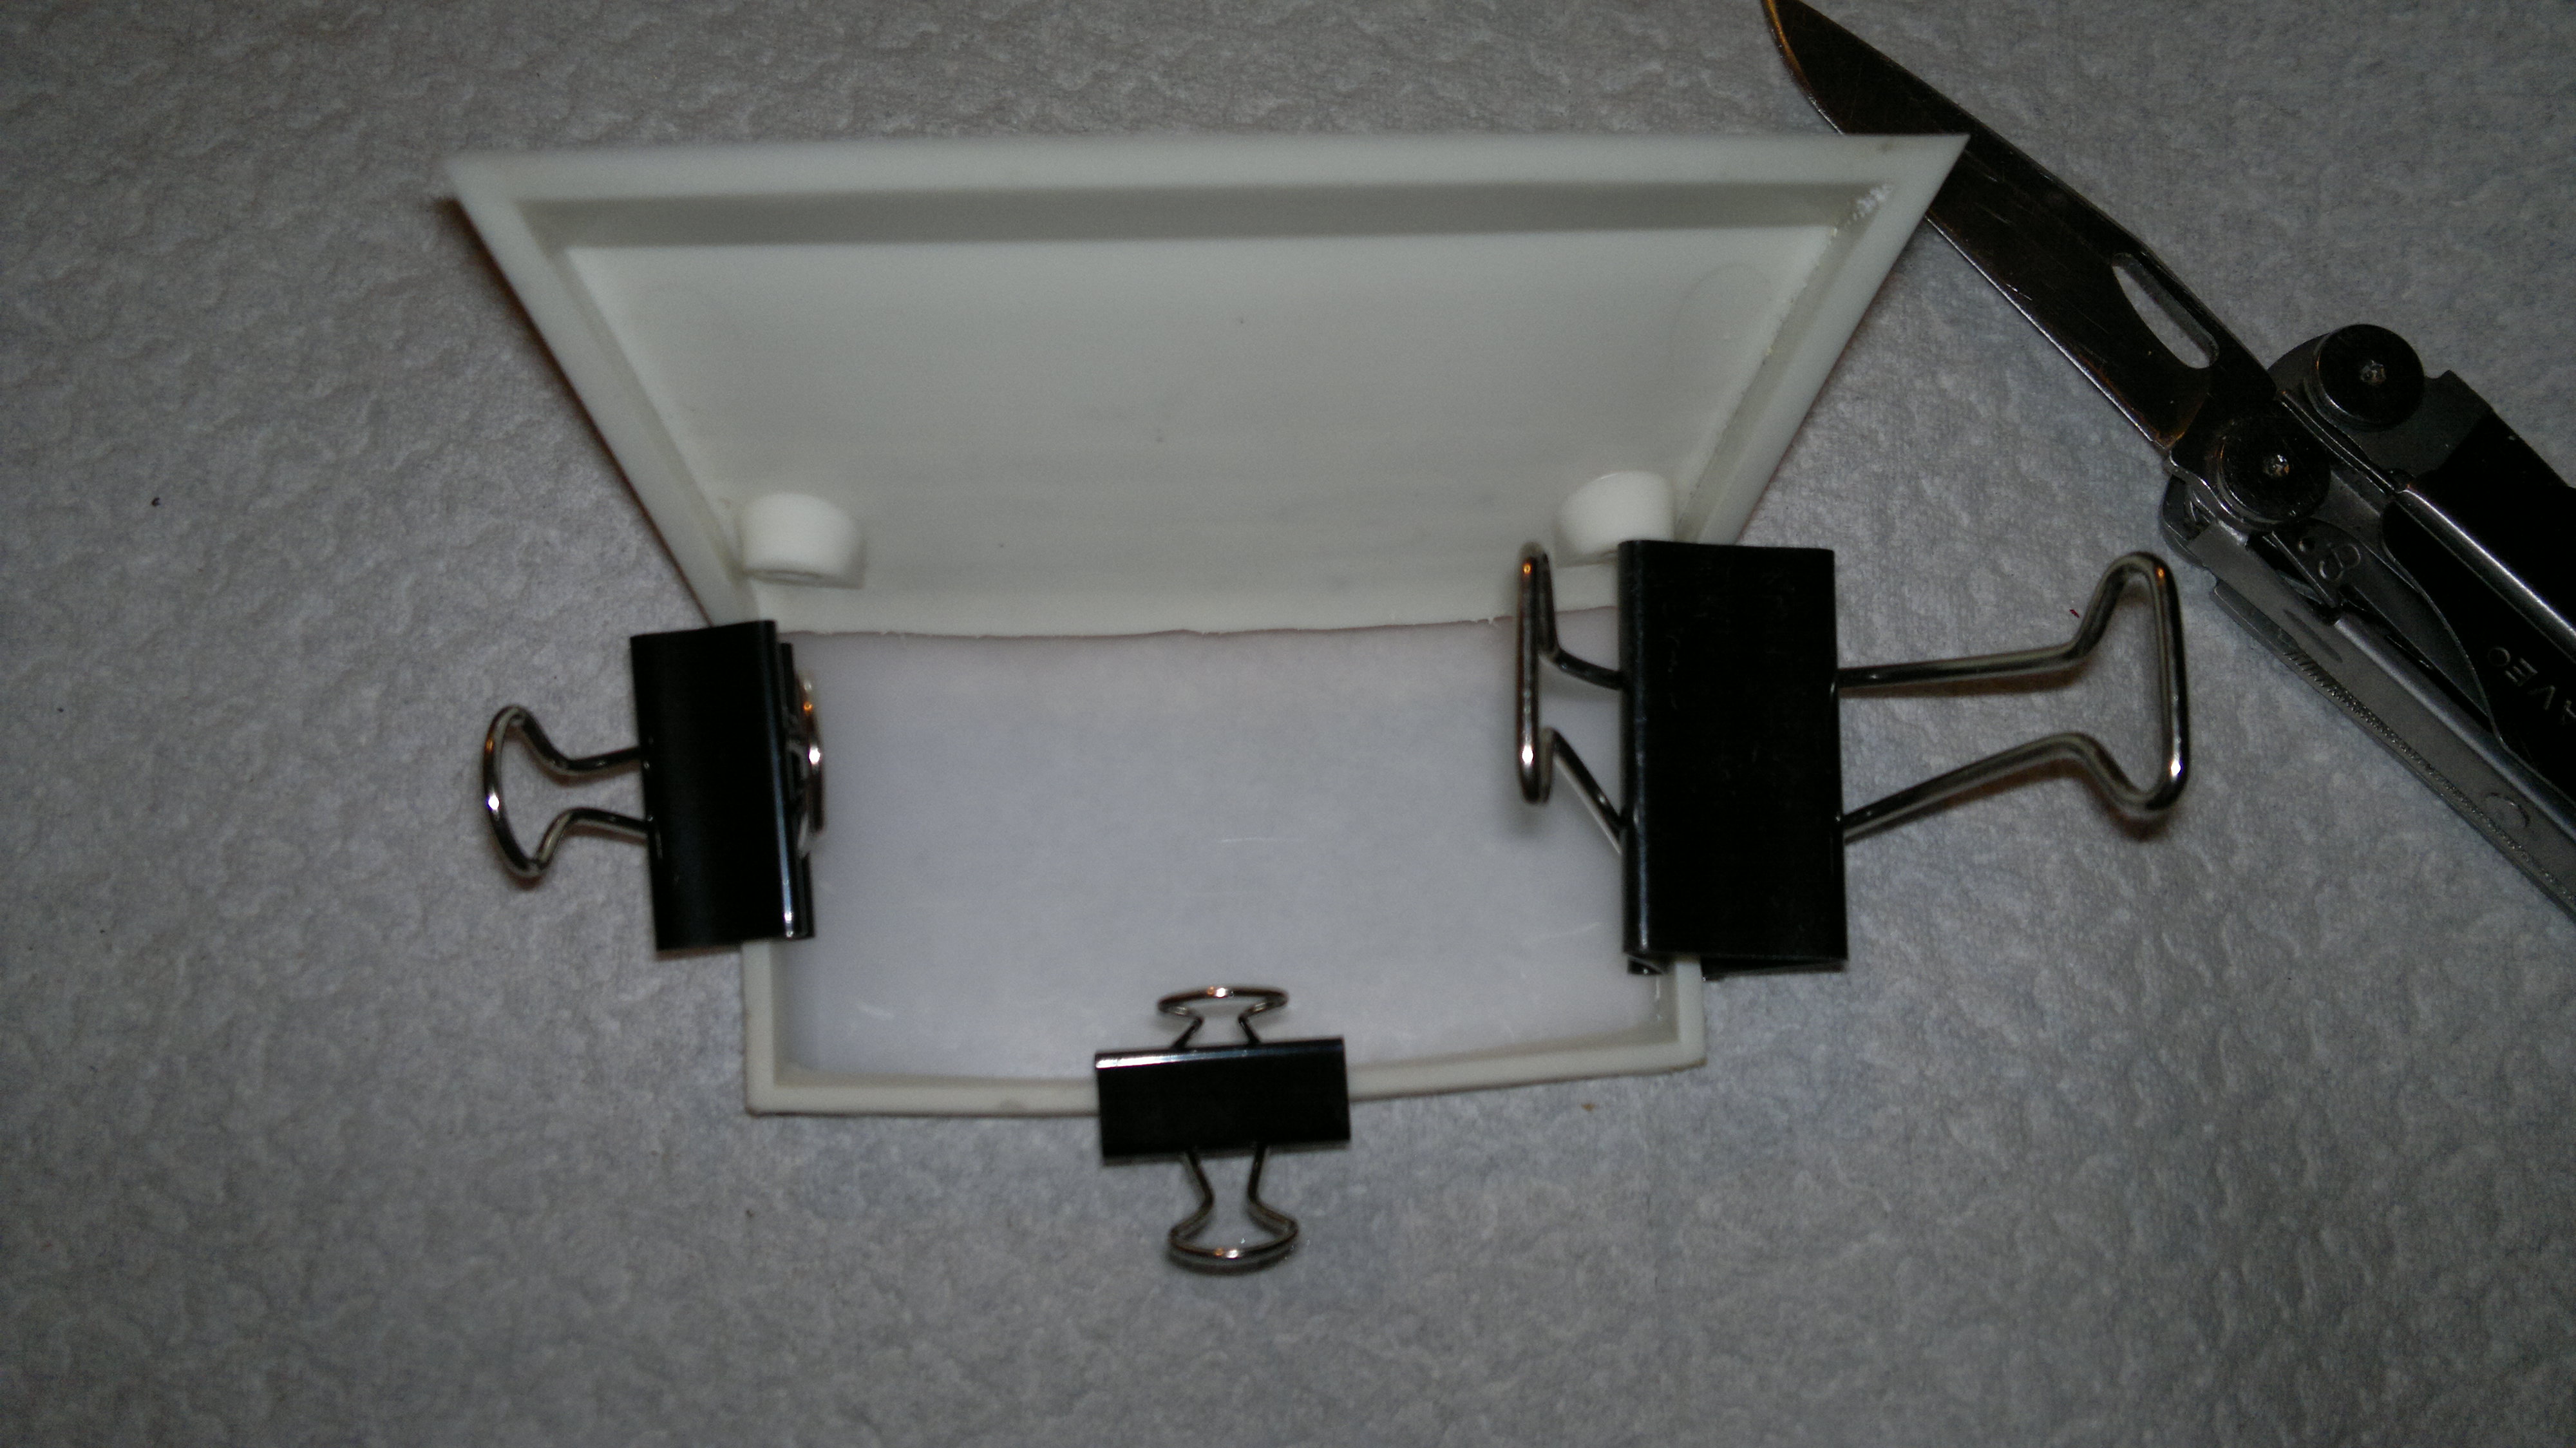
Made mine from an ice-cream container (pecan caramel) after a long and unsuccessful search. I attached some pictures of the process (cleaned up the frame after the pictured test fit). Looking forward to seeing your solution. BTW - can anyone provide a picture of the original lens? Regards, Alexander


-
 Yep! Also, have a closer look at the driver side exhaust manifold - no heat shield. Chassis- and engine-number match up, but there are obviously some irregularities to my engine. I simply assume that one of the previous owners did this. Probably when the electric fuel pump failed or the manifold cracked. My approach to the restoration is not to bring it back to the point how the car was, when it left the factory, but to let it tell its story as long as that does not mean to live with "real flaws". So I kept the engine as is and only took care of things that were mechanically wrong and the cosmetics. Alexander
 -
Randy, PVD uses vacuum and high temperature to deposit a vaporized coating material (aluminium, chromium and other metals) on surfaces. A gas is added (mostly nitrogen) that reacts with the metal vapour and forms a compound that finally bonds with the surface of the object you want to coat. Since this is a one stage process, the material of the object that you want to coat is almost irrelevant. In comparison,regular chrome plating only works on metal objects or objects that were metallized so it's not really practical for plastic parts. That being said, I would not call PVD chroming "cheap" but - at least here in Germany - it was the most economical solution for me.The three pieces you see on the pictures added up to 200€ (roughly $230). I am pretty sure that there are shops in Canada and the States as well that offer PVD coating. Alexander P.S. I really like your profile picture!
-
The plastic parts were PVD coated. The coating is not as resistant against scratches as "real" chrome but the application is much easier and the adhesion to the plastic is better. In addition, PVD coating is less expensive and less toxic. The faux wood inlays were scanned, digitally reproduced, printed onto self adhesive film and laminated with a matt transparent film. Light shines through the material. To avoid having illuminated boxes around the lettering when switching on the dash-lights, I stuck the new pieces onto the original ones which were made from thin metal sheets. The lettering lines up 99,85% and lights up nicely now. Trimming the pieces with an exacto knife, cutting out the holes, lining up the lettering and avoiding any bubbles and crinkles is grueling work and much cursing was involved, but I think it was totally worth it. Alexander


-
Hi everybody, after getting so much great advice from the community, I thought it would be nice to share some R-rated pictures of my overhauled and re-painted engine and the woodgrain kit a friend of mine made for me. I went with a more mahagony-like shade and since I never really liked the plastic handle of the shifter, I decided to break out the dremel and some woodstain and re-do the handle out of real wood. To finish the whole mahagony theme I also stained the wooden steering wheel which will replace the cracked original to match the other inlays. I hope you enjoy the pictures and thanks again for all your help. Alexander


-
The pieces were painted for sure - the backside shows the original antique gold color. In a few days we will know if I was able to bring them back to their original color... Alexander
-
Thanks for the compliments - I will open up another thread regarding the woodgrain later. Even though this was meant to be a one off, it might be feasible to print a few additional sets for fellow Riviera owners. Regarding the handle recess pieces - strangely enough it seems that mine were painted white over the original antique gold color. I was not sure if this for some reason might have been factory original. So here's another little project - I will try to remove the white paint with some thinner. Thanks Randy. Regards, Alexander
-
Just a little update: I received the carpet - medium saddle - from OC Carpets today. It is spot on! I ordered the version with the additional mass backing which - from the first impression - really is of high quality. Attached a picture. I also experimented with the wood grain. A friend who is a graphic designer copied the original lettering and we tried a few different wood textures. The result at this point is much darker than the original wood grain but I quite like it (pictures also attached). The design is printed onto self-adhesive film and will go right onto the old parts. The old inlays are printed on thin alloy and the letters are cut out so the dash lights shine through. By re-covering the old inlays,the shine-through effect stays the same. Not re-using the old parts would result in illuminated blocks around the letters since the new material is too thin. We have printed enough "blank" wood grain so I can replace the inlays in the doors and the console as well, hence the color difference between the old and new grain will not be a problem. Regards, Alexander


-
Thanks for the comments! Since I want to get rid of the speakers which a previous owner of my Riviera put into the doors (see picture above), I have to replace the whole carpet. So my question was more about finding the color that is as close as possible to the original than matching the new carpet to the old, aged and faded carpet that is on the door and kick panels. The door panels are being redone anyway, so it is not to big of a hassle to replace the carpet with the vinyl. On a side note - I ordered and stocked antique gold vinyl about three years ago at SMS autofabrics. Last week I got in touch with them to check if they could be of any help with finding the correct carpet. They are completely out of antique gold vinyl by now. Like Pat pointed out - that was not one of the most popular color options and due to the low demand, it seems that no manufacturer wants to reproduce the material (like the woodgrain kits for our 69/70 Rivieras - still looking b.t.w.). Luckily I bought a few yards extra for the carpet edges and possible repairs in the (far away) future, phew! Back to topic: I found OC Autocarpets where one of their customer support people, Amy, was of great help. She was able to match vinyl and carpet. And medium saddle it is! They also sell carpet by the yard. So, even though shipping to Germany costs a fortune, I will order from them. Another piece of the puzzle - the Riv is getting there. Slowly but steady... Thanks again, Alexander
-
I would like to bring this up again - anyone with an idea? Thanks, Alexander
-
Hi Everyone and HAPPY NEW YEAR! I am looking for the correct carpet for my '69 Riviera (Trim code 692, VIN 494879H952671). The vinyl is called "antique gold". My guess would be, that the carpet colour is "medium saddle" like this set from 1A-Auto: http://www.1aauto.com/1966-70-buick-riviera-complete-carpet-11-medium-saddle/i/zaick14396?f=772764&y=1969. Can anyone confirm that or send me into the right direction? Attached you can find a picture of the door inlets that reflects the colour pretty well. Also, I would appreciate any tip for a good source where I can buy the carpet, besides the two large molded pieces I also need some extra-material for the kick-panels and the doors and everything has to be shipped to Germany. Thanks and best regards, Alexander

-
Hi everyone, my Riviera's 430 engine is being overhauled at the moment (the one thing I left to the professionals) and should be ready by the end of the month. When I pulled and disassembled the engine, about 50 percent of the exhaust manifold's bolts snapped. With some effort, the bolts came out and the threads were re-done. BUT during the process, nobody actually thought about taking notes of the length of the different bolts. I figured out how big of a mistake this was, when I got the new set of (stainless) bolts from yearone and realized that there are actually five different lengths of bolts. Unfortunately the service manual leaves this topic unaddressed and even though it is obvious where the longest bolt and two of the second-longest bolts go, I am unsure of the remaining 11 bolts. Anyone out there who can give me advice on the correct bolt pattern? Here is a picture of the two (freshly painted) exhaust manifolds: And here are the bolts. The picture is taken of eBay, the seller is neverrustfasteners who holds the copyrights, but the set seems to be the same that I bought: Thanks a lot, Alexander


-
Torque rod driver side door '69 Riviera
mannemerjung replied to mannemerjung's topic in Buick Riviera
... and has been one of my best friends during this restoration so far. But unfortunately the two sellers who seem to part out a '68 and a '69 do not respond to my messages. GMsports.com are also parting out '68/'69 Rivieras - I will give them a call next Monday. They are not too far away from Sunnyvale where I will be doing some business next week. So maybe I will have some luck with those guys. Thanks, Alexander